Introduction to Old-Fashioned Pink Jelly Cakes
A delicious trip down memory lane
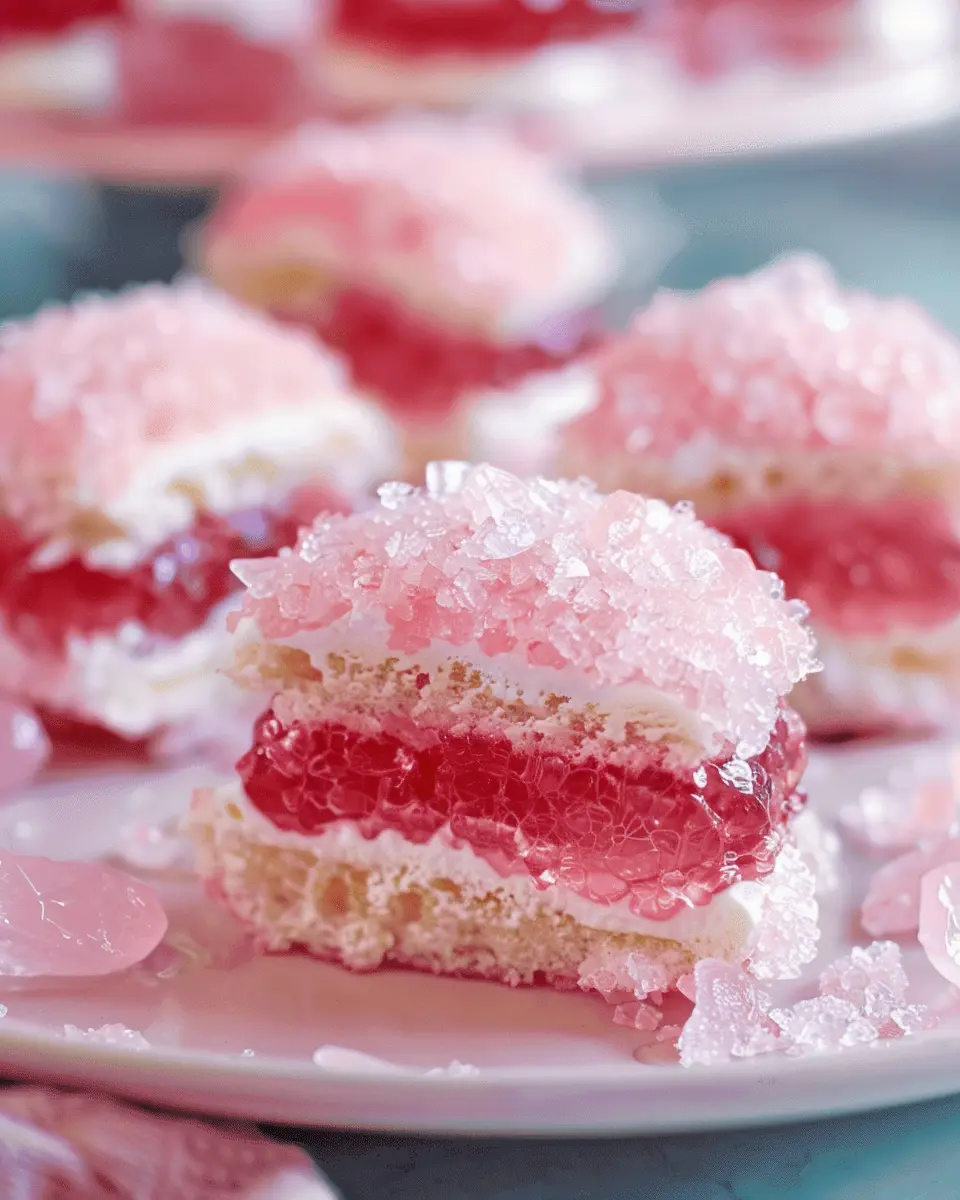
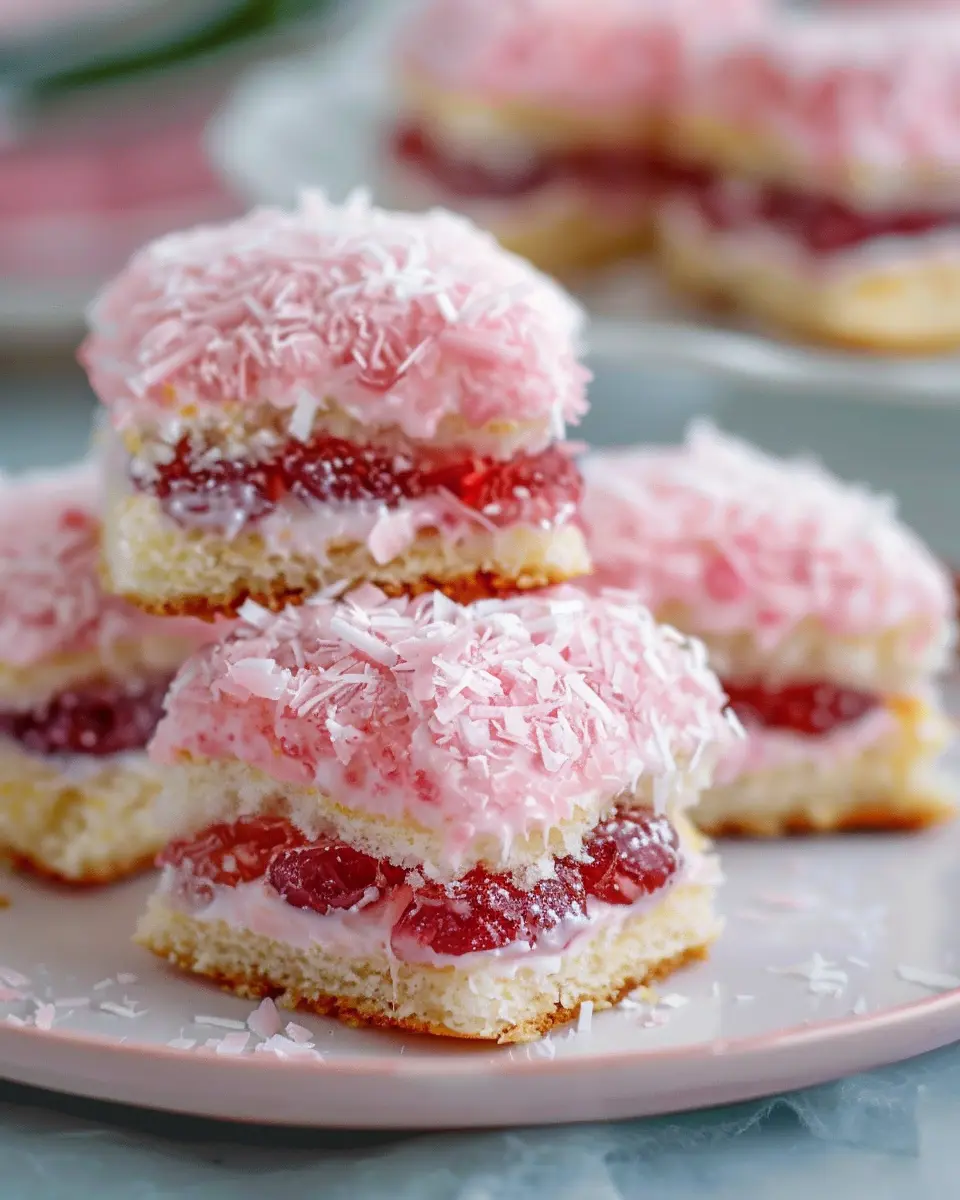
When you think about desserts that bring comfort, old-fashioned pink jelly cakes surely top the list. There’s something enchanting about these delightful treats, with their elegant layers and sweet, fruity essence. Imagine your grandmother serving these at family gatherings or those nostalgic bake sales from your childhood. They evoke a vibe that’s hard to match—simple yet special, they remind us of a time when desserts were made with love and care.
These cakes are not just a feast for the taste buds; they’re a trip down memory lane. With their charming, pink-hued jelly topping glistening under the light, they beckon to be shared among friends and family. It’s the kind of dessert that invites stories, laughter, and those wistful moments we all cherish.
The nostalgia behind pink jelly cakes
The charm of old-fashioned pink jelly cakes lies not only in their taste but also in their story. Traditionally, these cakes were a staple at garden parties and festive occasions, often featured in the kitchens of home bakers who took pride in their confections. As baking became popularized (you can check out more on this evolution at NPR), desserts like pink jelly cakes became part of the cultural landscape, reflecting both family traditions and regional flavors.
What’s interesting is that the incorporation of jelly can be traced back to various occasions where it symbolized celebration and joy. Using gelatin in cooking dates back centuries; these cakes are a modern twist on old dessert traditions. As we look for ways to connect our busy lives with simpler pleasures, it’s easy to see why recreating recipes like this holds such significance. They remind us of the heartwarming times we spent with loved ones—moments that could easily become overshadowed in our fast-paced lives.
Whether you’re planning a tea party or simply want to impress your friends at your next gathering, crafting your own old-fashioned pink jelly cakes can be an experience filled with joy. So, why not embrace this sweet nostalgia and create something that not only tastes good but feels good too?
Ingredients for Old-Fashioned Pink Jelly Cakes
Essential ingredients for success
Creating old-fashioned pink jelly cakes requires a select few ingredients that come together beautifully to achieve that delightful, nostalgic flavor. Here’s what you’ll need:
- All-Purpose Flour: This is the foundation of your cake, giving it that tender crumb.
- Granulated Sugar: For sweetness and moisture.
- Baking Powder: To help your cake rise to perfection.
- Unsalted Butter: This adds richness; using high-quality butter can elevate your cake.
- Eggs: Fresh eggs are key for a light texture.
- Milk: Whole milk will give your cake a nice consistency.
- Strawberry or Raspberry Jelly: The star of the show! Choose a well-made jelly for the best flavor.
Notes on ingredient quality
Ingredient quality can transform your old-fashioned pink jelly cakes. Opt for organic or local products when possible. For example, fresh eggs from a farmer’s market can make a noticeable difference in taste and texture. Furthermore, consider using artisanal jams or jellies that contain real fruit and fewer preservatives. This can enhance both flavor and nutritional value.
As you gather your ingredients, envision the delightful memories these cakes will conjure! Investing in quality will not only improve the taste but also your overall baking experience. For more insights on ingredient selection, you might find Food Network helpful. Happy baking!
Step-by-step preparation of Old-Fashioned Pink Jelly Cakes
Making old-fashioned pink jelly cakes is a delightful way to connect with culinary traditions while creating a delicious treat that beckons to both nostalgia and modern flavors. Let’s walk through each step together to ensure your cakes turn out perfect!
Gather your tools and ingredients
Before diving into the baking process, it’s essential to gather all the tools and ingredients you’ll need. Here’s a quick checklist:
Tools:
- Mixer (hand or stand)
- Mixing bowls
- Spatula
- Measuring cups and spoons
- Patty pans or muffin tins
- Cooling rack
- Small saucepan
Ingredients:
- 125g unsalted butter, softened
- 125g caster sugar
- 2 large eggs
- 125g self-raising flour
- 1 teaspoon vanilla extract
- 1 pack of strawberry jelly (gelatin)
- Water (for jelly)
- Pink food coloring (optional for an enhanced hue)
Creaming the butter and sugar
Start by creaming the softened butter and caster sugar in a mixing bowl. Use your mixer at medium speed until the mixture becomes light and fluffy. This process is key; it adds air to the batter, giving your cakes a lovely texture. This step usually takes about 3-5 minutes. It’s quite satisfying to see this transformation!
Adding eggs and flour
Once your butter and sugar have reached peak fluffiness, it’s time to add the eggs, one at a time. Blend them in thoroughly, ensuring each egg is completely incorporated before adding the next. Then, gently fold in the self-raising flour and vanilla extract. Mixing the flour requires a gentle touch to keep the batter airy.
Filling the patty pans
Now it’s time to fill those patty pans! Preheat your oven to 180°C (350°F) and line your pans with cupcake liners if desired. Use a spoon or an ice cream scoop to fill each pan about two-thirds full with the batter. This allows enough room for the cakes to rise beautifully.
Baking to perfection
Slide your filled patty pans into the preheated oven and bake for about 15-20 minutes, or until the tops are golden brown and a toothpick inserted into the center comes out clean. This might be the perfect moment to hum your favorite baking tune as the delightful aroma fills your kitchen!
Preparing the strawberry jelly
While your cakes are cooling on a rack, prepare the strawberry jelly according to the package instructions. Typically, this involves boiling water, dissolving the jelly in it, and then letting it cool slightly before transferring it to the fridge to thicken. This step requires a bit of patience, but the anticipation makes it so worthwhile!
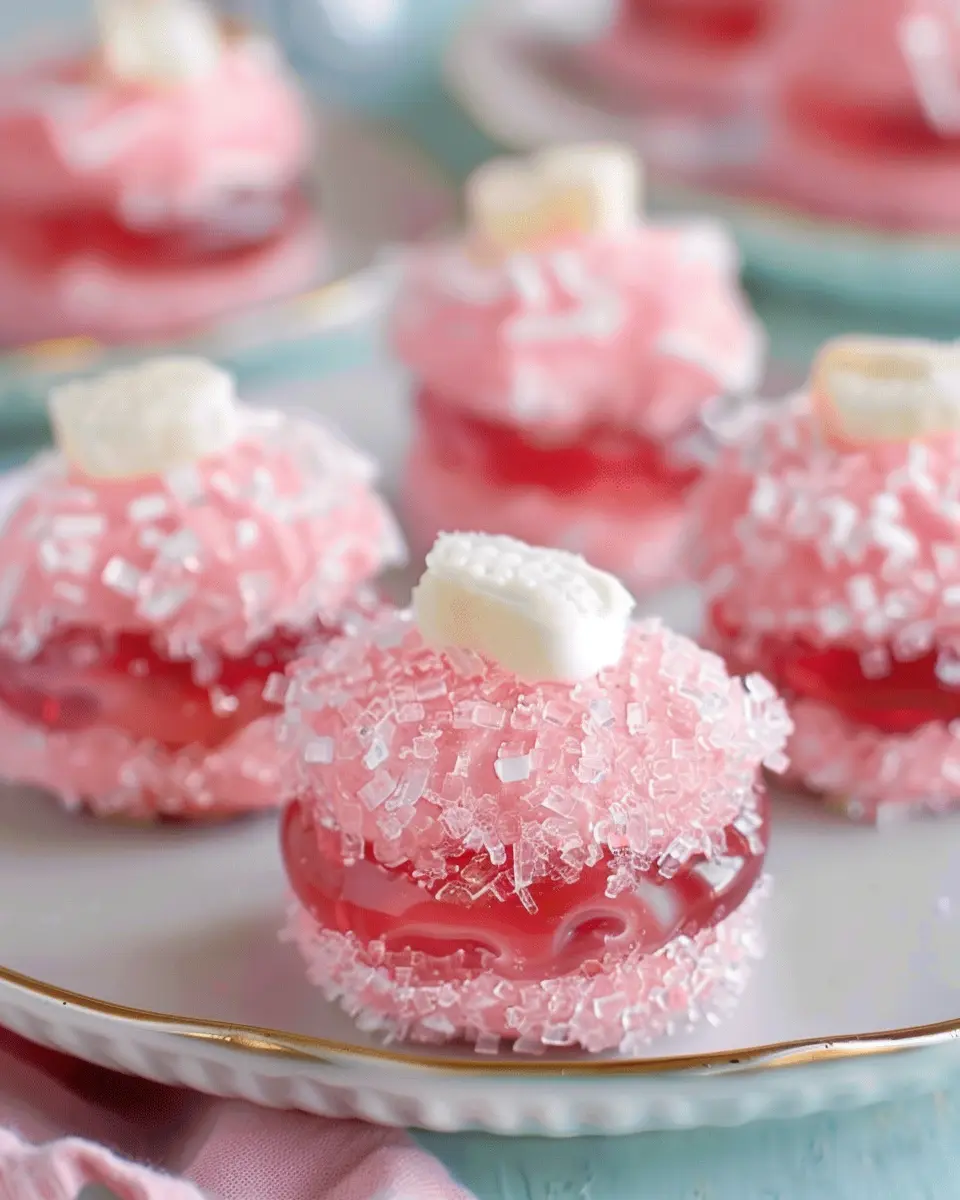
Dipping and coating cakes
Once your old-fashioned pink jelly cakes have cooled completely, prepare for the fun part: dipping! Pour the cooled jelly into a shallow bowl. Dip each cake halfway into the jelly, allowing the excess to drip off. This coating not only adds flavor but also gives the cakes that signature ‘pink’ appeal.
Assembling the jelly cakes
After dipping, you could add an additional delight! If you want a bit of crunch, consider rolling the dipped cakes in desiccated coconut or sprinkles while they are still wet. The choices here are endless! Finally, place them on a serving plate.
Setting in the fridge
The final step is allowing your cakes to set in the refrigerator for at least 30 minutes. This ensures that the jelly coats solidify and all flavors meld beautifully. While waiting, maybe catch up on some episodes of your favorite show or enjoy a cup of tea.
By following these steps, your old-fashioned pink jelly cakes will not just look beautiful but taste heavenly too! Once out of the fridge, they’re ready to wow your friends and family. Happy baking!

Variations of Old-Fashioned Pink Jelly Cakes
Alternative Jelly Flavors
When it comes to old-fashioned pink jelly cakes, the classic raspberry jelly is delightful, but don’t hesitate to explore other flavors! Imagine the vibrant taste of strawberry, blueberry, or even peach gel. Switching it up can lend a fresh twist to your cake and spark conversation at your gathering. For a unique flavor explosion, try combining two jellies, like raspberry and lime, for a zesty kick.
You can find various jelly options at your local grocer, or even try making your own homemade jelly. This customization not only adds your personal touch but also enhances the flavor profile of your mini cakes! For a step-by-step guide on making fruit preserves, check out this resource from Food Network.
Creative Fillings Beyond Whipped Cream
While whipped cream is a classic filling for old-fashioned pink jelly cakes, think outside the box! Consider using lemon curd for a tart contrast, or even mascarpone cheese mixed with a hint of vanilla for a rich, creamy filling. You could also layer in fresh fruit like berries or banana slices for natural sweetness and texture.
Another exciting option is using custard or pastry cream, which can add depth to your cakes. For a festive flair, why not try filling them with a dollop of chocolate mousse? The contrasts between flavors and textures will surely impress your guests. Whatever direction you take, the key is to maintain that lovely balance of sweetness—so taste as you go!
Engaging with flavors and experimenting with fillings not only keeps the tradition of old-fashioned pink jelly cakes alive but also ensures they stay relevant and exciting for today’s palate.
Cooking Tips and Notes for Old-Fashioned Pink Jelly Cakes
Common Mistakes to Avoid
When crafting your old-fashioned pink jelly cakes, it’s easy to overlook a few key details that can affect the outcome. Here are common pitfalls:
- Overmixing the Batter: Too much mixing can lead to dense cakes. Aim for just combined ingredients.
- Incorrect Oven Temperature: Always preheat your oven. A hot oven is key to achieving that lovely rise and soft crumb.
- Failing to Cool Properly: Letting your cakes cool completely before frosting is essential to prevent the frosting from melting and making a mess.
Storage Tips for Freshness
To ensure your pink jelly cakes remain delightful for days, consider these storage tips:
- Room Temperature Preservation: If you plan to eat them within a couple of days, simply cover them with plastic wrap or place them in an airtight container at room temperature.
- Refrigeration: For longer storage, refrigerate the cakes, especially if filled with jam.
- Freezing: Want to save some for later? Wrap individual slices tightly in foil and store them in a freezer bag. They can last up to three months and will still taste divine when thawed!
By avoiding common mistakes and following these storage tips, your old-fashioned pink jelly cakes will be a treat you can enjoy anytime! For more tips on baking fundamentals, check out resources like King Arthur Baking for expert advice.
Serving suggestions for Old-Fashioned Pink Jelly Cakes
Pairing with beverages
When it comes to enjoying your old-fashioned pink jelly cakes, the right beverage can elevate your experience. Consider serving these delightful treats with a refreshing iced tea or a zesty lemonade. The brightness of these drinks complements the sweetness of the jelly cakes beautifully. If you’re looking for something warm, a cup of herbal tea, like chamomile or mint, can create a perfect cozy atmosphere, especially on a chilly day. For a more upscale event, sparkling water with a slice of lemon can add a touch of elegance without overwhelming the palate.
Presentation ideas for gatherings
Presentation is key when serving old-fashioned pink jelly cakes at your next gathering. Here are a few ideas:
- Tiered cake stands: Arrange the jelly cakes on tiered cake stands to create height and interest.
- Colorful platters: Use bright and vibrant platters to enhance the pink hues of your cakes.
- Garnishes: Add some fresh berries or edible flowers to the platter for a pop of color and freshness.
By focusing on these simple yet effective tweaks, you’ll impress your guests and make your old-fashioned pink jelly cakes the star of the show! For more serving ideas, check out Martha Stewart for tips on how to elevate your dessert presentations.
Time breakdown for Old-Fashioned Pink Jelly Cakes
Preparation time
Making old-fashioned pink jelly cakes isn’t just about following a recipe; it’s an experience filled with delightful anticipation! You’ll need around 30 minutes to prepare your ingredients and mix them together. Ensure everything is measured out in advance to streamline the process—trust me, it’ll make a world of difference.
Baking time
The baking is where the magic happens! Allocate 20 to 25 minutes for those lovely cakes to rise beautifully in the oven. Keep an eye on them, as all ovens vary a bit. You want that perfect golden hue—nothing beats the smell wafting through your kitchen!
Total time
In total, you’re looking at roughly 1 hour from start to finish. Easy, right? So grab a friend, put on some fun music, and enjoy the baking journey of your old-fashioned pink jelly cakes. For more delectable cake recipes and tips, check out Taste of Home or BBC Good Food. Happy baking!
Nutritional facts for Old-Fashioned Pink Jelly Cakes
Caloric content
When it comes to old-fashioned pink jelly cakes, indulging in a sweet treat can still fit into a balanced diet. Each cake typically contains about 120-150 calories, depending on the size and specific ingredients used. For a little perspective, it can be a delightful afternoon snack paired with your favorite herbal tea.
Key nutrients
These charming cakes don’t just satisfy your sweet tooth; they also provide some essential nutrients:
- Carbohydrates: A great source of quick energy.
- Sugars: Naturally occurring sugars help to provide that sweet flavor we love.
- Fats: Usually low in fat, particularly when made with lighter ingredients.
- Fiber: If you add whole grain flour, you’ll boost the fiber content, promoting digestive health.
If you’re curious about different dietary options or want to optimize your health, consider exploring resources like the USDA FoodData Central for more information on the nutritional values of various ingredients. Enjoying these delightful treats in moderation can both satisfy your cravings and keep your nutrition on track!
Frequently Asked Questions about Old-Fashioned Pink Jelly Cakes
Can I make these in advance?
Absolutely! One of the great things about old-fashioned pink jelly cakes is their flexibility. You can bake the cake layers a day or two in advance. Simply cool them completely, wrap them tightly in plastic wrap, and store them in the refrigerator. When you’re ready to assemble, let them come to room temperature before spreading on your jelly. Just remember, freshly prepared jelly tends to have a better texture and flavor, so try to add that closer to serving time.
How do I get the jelly to stick?
Getting that vibrant jelly to adhere perfectly to your old-fashioned pink jelly cakes is key. First, ensure your cake layers are cool—warm cakes can cause the jelly to slide right off! A light brushing of syrup or a thin layer of cream cheese frosting can help create a sticky base for the jelly. After spreading the jelly, let it set in the fridge for about 30 minutes; this will help it firm up and cling better to the cake.
What can I do with leftover cake batter?
If you find yourself with leftover cake batter, don’t let it go to waste! Pour it into cupcake liners and bake for a fun twist on your old-fashioned pink jelly cakes. You could also make a mini loaf or a small cake to enjoy later. Another option is to freeze the batter in airtight containers for future use—just remember to label it with the date and type of cake. Many bakers love to have a bit of homemade cake batter on hand for spontaneous dessert nights!
For more tips on baking, check out resources like the King Arthur Baking Company or America’s Test Kitchen for expert advice and innovative recipes that can elevate your culinary adventures.
Conclusion on Old-Fashioned Pink Jelly Cakes
Embracing homemade sweetness
Baking old-fashioned pink jelly cakes is more than just a delightful recipe; it’s a journey back to simpler times, filled with warmth and nostalgia. These cakes not only satisfy your sweet tooth but also evoke cherished memories. Making them at home allows you to customize texture and flavor, ensuring each bite is just right for your taste buds.
As you gather your ingredients and mix the batter, think of it as a creative outlet. Sharing these cakes with friends and family can transform bites into heartfelt moments. Start your baking adventure today and savor the homemade sweetness that defines these old-fashioned pink jelly cakes. For more tips on baking, visit The Spruce Eats or Food52.
PrintOld-Fashioned Pink Jelly Cakes: Delightful Treats You’ll Love
Delight in the nostalgic taste of Old-Fashioned Pink Jelly Cakes, a cherished treat that evokes memories and delights the palate.
- Prep Time: 20 minutes
- Cook Time: 30 minutes
- Total Time: 50 minutes
- Yield: 8 servings
- Category: Desserts
- Method: Baking
- Cuisine: American
- Diet: Vegetarian
Ingredients
- 2 cups all-purpose flour
- 1 cup granulated sugar
- 1 teaspoon baking powder
- 1/2 teaspoon salt
- 1/2 cup unsalted butter, softened
- 1 cup milk
- 2 large eggs
- 1 teaspoon vanilla extract
- 1/2 cup strawberry jelly
- 1 cup powdered sugar
- 1-2 tablespoons milk for frosting
Instructions
- Preheat the oven to 350°F (175°C). Grease and flour two round cake pans.
- In a large bowl, combine flour, sugar, baking powder, and salt.
- Add softened butter, milk, eggs, and vanilla extract. Mix until smooth.
- Divide the batter evenly between the prepared pans.
- Bake for 25-30 minutes or until a toothpick comes out clean.
- Let the cakes cool in the pans for 10 minutes before transferring to wire racks.
- Once cool, spread a layer of strawberry jelly between the cakes.
- For the frosting, mix powdered sugar with milk until desired consistency is reached.
- Frost the top and sides of the cake with the icing.
- Slice and serve your delightful jelly cakes.
Notes
- For a stronger flavor, use homemade strawberry jelly.
- Allow the cakes to chill for a couple of hours before serving for best texture.
Nutrition
- Serving Size: 1 slice
- Calories: 250
- Sugar: 20g
- Sodium: 150mg
- Fat: 10g
- Saturated Fat: 6g
- Unsaturated Fat: 4g
- Trans Fat: 0g
- Carbohydrates: 36g
- Fiber: 1g
- Protein: 3g
- Cholesterol: 40mg