Outline for Old Fashioned Butter Tarts
Introduction to Old Fashioned Butter Tarts
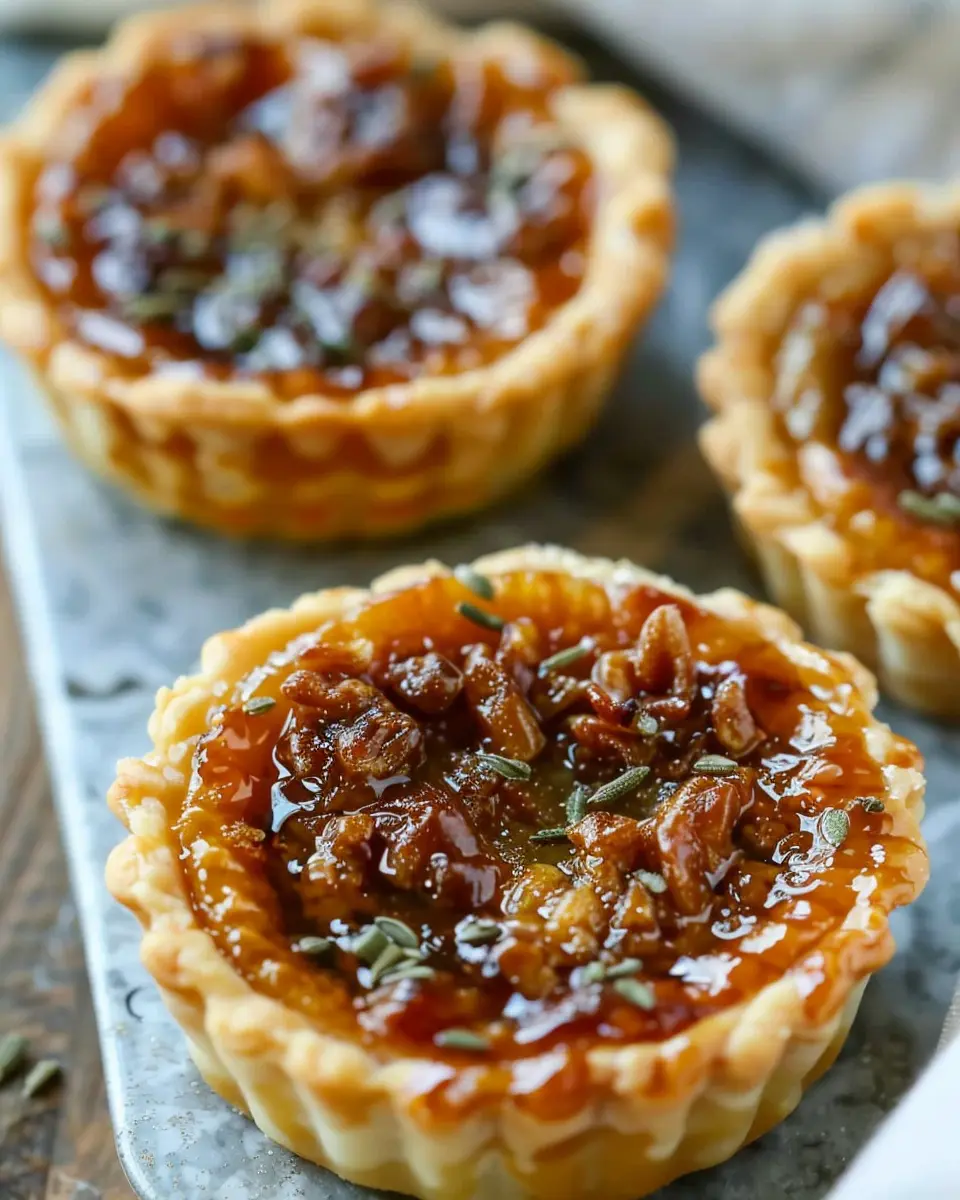
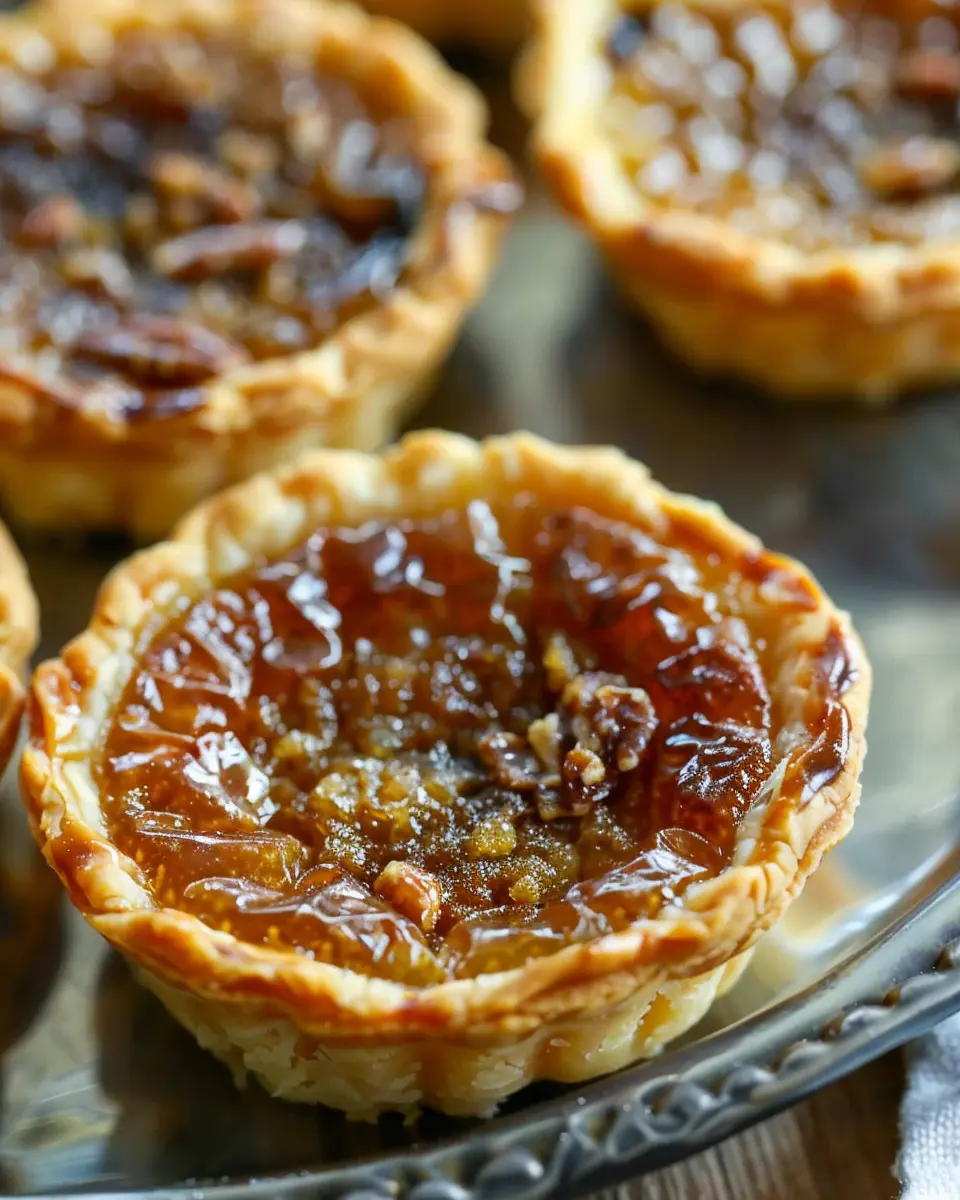
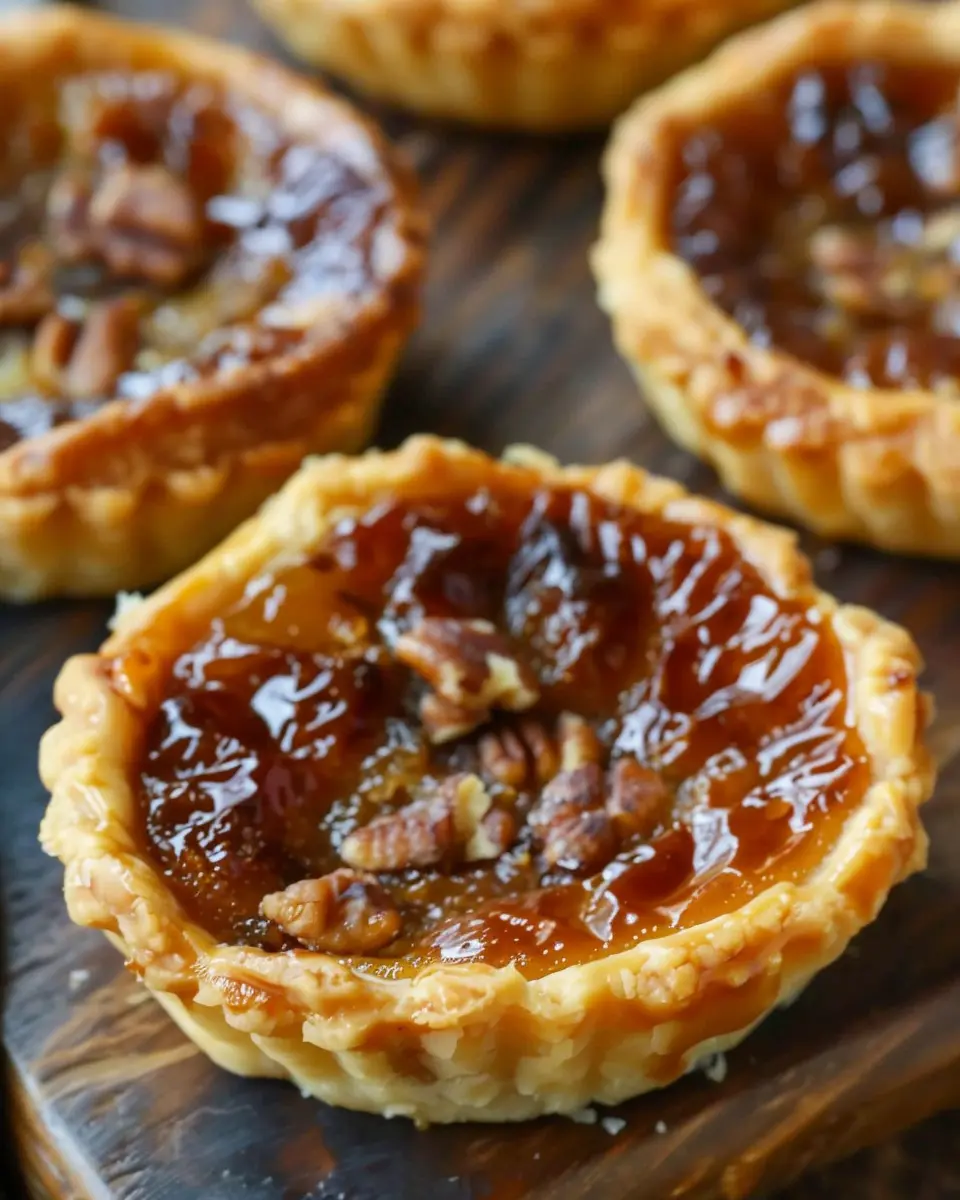
Ah, old fashioned butter tarts. When you think of comforting desserts that evoke feelings of nostalgia, these little jewels of sweetness usually come to mind. Originating in Canada, these delightful pastries are known for their gooey filling, flaky crust, and sweet, buttery aroma. But they’re not just a delicious treat; they embody a rich history and tradition that makes them truly special. Today, we’ll explore everything you need to know about making these tasty bites, from the ingredients to various tips that will elevate your baking game.
The History Behind Butter Tarts
Before we delve into the recipe, let’s take a moment to appreciate the history behind old fashioned butter tarts. These pastries are believed to have originated in the early 19th century. While their exact roots are somewhat murky, most agree they stemmed from the classic English treacle tart. You might find it interesting that butter tarts were often used in Canadian homes as a way to use up leftover ingredients.
Curious about the ultimate mix of flavors and textures in your butter tarts? According to the Canadian Cooking Heritage, the key to a perfect tart lies not only in the filling but also in the quality of the pastry itself. The evolution of old fashioned butter tarts reflects the spirit of home baking, with each family adapting the basic recipe to fit their palates.
Ingredients You’ll Need
The magic of old fashioned butter tarts starts with a few simple ingredients. Here’s what you’ll need to gather:
-
For the Pastry:
-
2 ½ cups all-purpose flour
-
½ teaspoon salt
-
1 cup unsalted butter, chilled and cubed
-
½ cup ice water
-
For the Filling:
-
1 cup brown sugar, packed
-
½ cup corn syrup
-
½ cup unsalted butter, melted
-
2 large eggs
-
1 teaspoon vanilla extract
-
½ cup currants or raisins (optional)
These ingredients come together to create a delectable balance of sweetness and richness. Notice the combination of corn syrup and brown sugar; this is what gives your tarts that unique gooey texture while enhancing the overall sweetness.
Preparing the Pastry
Making the pastry for old fashioned butter tarts can be a relaxing part of the baking process. Here’s how to do it:
-
Combine dry ingredients: In a large bowl, mix the flour and salt. This step ensures that the salt is evenly distributed throughout the dough.
-
Cut in the butter: Using a pastry cutter or your fingers, combine the cold butter with the flour until it resembles coarse crumbs. Remember, the colder the butter, the flakier your pastry will be!
-
Add ice water: Slowly mix in ice water, one tablespoon at a time, until the dough holds together. Avoid overworking it; you want your pastry to remain tender.
-
Chill the dough: Wrap the dough in plastic wrap and refrigerate for at least 30 minutes. This resting period is crucial for developing flavor and preventing shrinking during baking.
By using fresh ingredients and taking your time with the pastry, you’ll set a solid foundation for your old-fashioned butter tarts.
Making the Filling
Now, let’s move on to crafting the filling. This is where the magic really happens!
-
Mix the filling ingredients: In a mixing bowl, whisk together the brown sugar, corn syrup, melted butter, eggs, and vanilla extract until smooth. If you’re including currants or raisins, fold them in last. These add a pleasant chewiness that complements the rich filling perfectly.
-
Taste before baking: Here’s a fun tip — if you want to ensure your filling is perfectly balanced, taste a small spoonful. Just remember to let it cool first!
Assembling Your Old Fashioned Butter Tarts
With your pastry and filling ready, it’s time to assemble:
-
Preheat your oven: Set your oven to 375°F (190°C) so it’s hot and ready when you’re done assembling.
-
Roll and cut the pastry: On a lightly floured surface, roll out the chilled dough to about 1/4 inch thick. Cut out circles that fit your muffin tin; most people use a 3-inch cutter.
-
Place in muffin tin: Gently fit each circle into the muffin tin cups, pressing them down to ensure a snug fit.
-
Fill the tarts: Spoon the prepared filling into each pastry shell, filling them about 2/3 full. Remember that the filling will expand as it bakes, so don’t overfill them.
-
Bake them: Place the muffin tin in your preheated oven and bake for 20-25 minutes, or until the edges are golden brown and the filling is bubbly.
-
Cool before serving: Allow the butter tarts to rest in the pan for 10 minutes before transferring them to a wire rack to cool completely. This waiting period is vital to help them set properly.
Customizing Your Butter Tarts
Now that you’re comfortable with the classic version of old fashioned butter tarts, let’s mix things up!
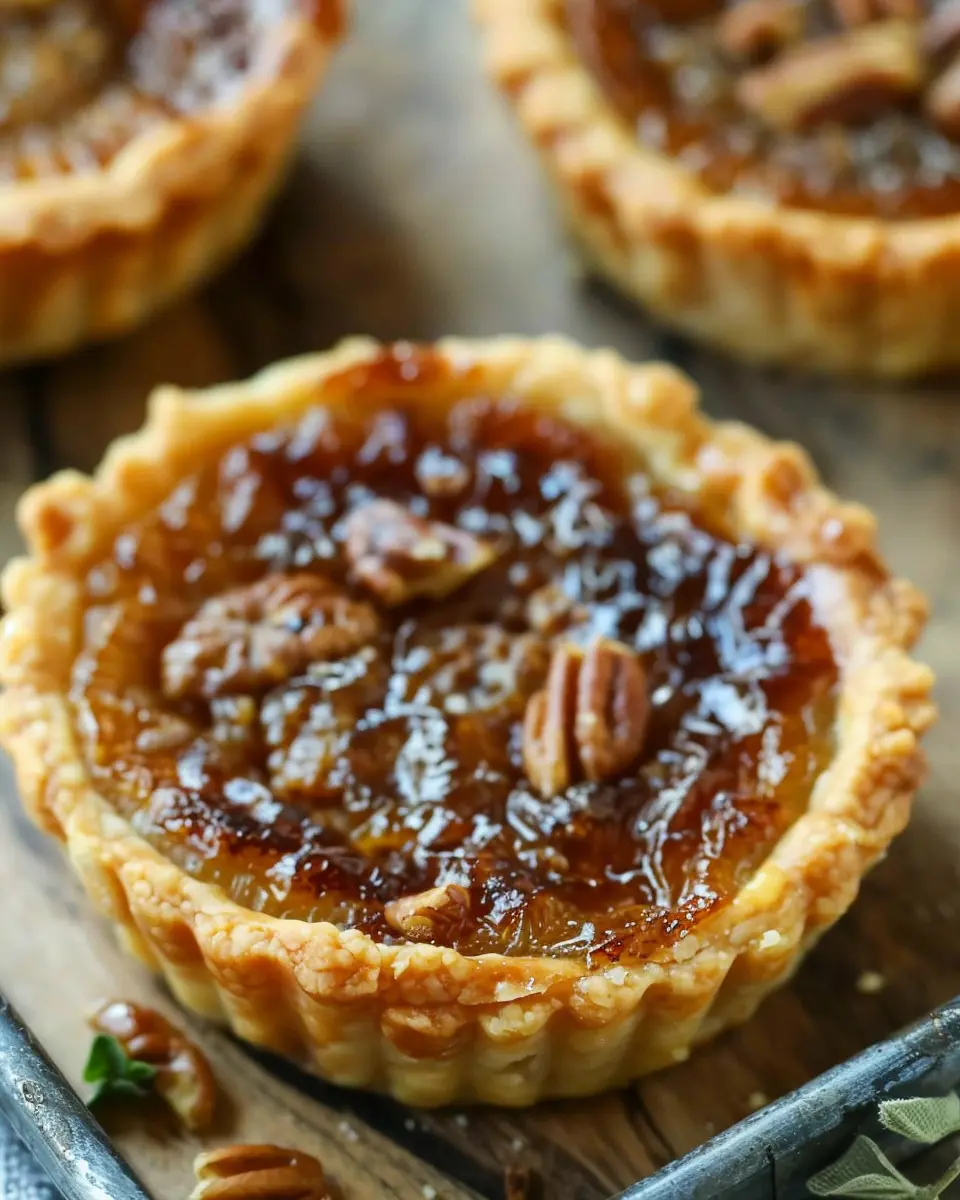
- Add nuts: Chopped pecans or walnuts can provide a delightful crunch.
- Experiment with flavors: Why not add a splash of maple syrup or almond extract for a twist?
- Variety of fillings: Some enjoy adding chocolate chips for an extra indulgence or browsing through site sources like Canadian Living for inspiration on different fillings.
Tips for Success
Perfecting your old fashioned butter tarts is an art. Here are a few tips to ensure your baking endeavor is a success:
- Keep ingredients cold: The key to a flaky pastry is using cold ingredients. This helps keep the butter solid until it hits the oven.
- Don’t rush: Take your time during the mixing and baking process. Quality takes time; rushing can lead to tough pastry.
- Use a quality muffin tin: A dark non-stick pan can help achieve that perfect golden crust.
Storing Your Butter Tarts
Once you’ve made your tarts, you’ll want to savor their fresh goodness. If you find yourself with extras, here’s how to store them:
- At room temperature: Store them in an airtight container for up to two days.
- In the fridge: If you’d like them to last longer, you can refrigerate them for about a week.
- Freezing: If you want to really save some for later, freeze them! Just ensure they’re completely cooled, and then wrap them tightly before placing them in the freezer. They’ll keep well for up to three months.
Conclusion
Baking your own old fashioned butter tarts is not just about the end product; it’s about creating a beautiful experience both in the kitchen and around the table. Whether you’re enjoying them with a cup of tea or sharing them at a gathering, they bring a taste of home and heritage that we can all appreciate.
So why not give this recipe a try? Your homemade old fashioned butter tarts will surely impress your friends and family. For more inspiration, check out resources such as Bake Canada, your ultimate guide to delightful Canadian baking recipes. Happy baking!
Introduction to Old Fashioned Butter Tarts
The allure of homemade desserts
There’s something irresistibly comforting about homemade desserts, don’t you think? The warm, inviting scents that fill your kitchen as you bake create a sense of nostalgia, a connection to times spent gathered around the table with family and friends. When we talk about old fashioned butter tarts, we’re diving into a timeless treat that encapsulates that warmth perfectly. With their flaky crusts and gooey, sweet filling, these little bites of heaven remind us of simpler times and the joy found in homemade goodness.
Why butter tarts are a classic Canadian treat
Originating in Canada, butter tarts hold a special place in the hearts of many food enthusiasts. They are a symbol of Canadian culinary heritage and have been cherished for generations. According to The Canadian Encyclopedia, the earliest recipes date back to the 19th century and feature simple ingredients like butter, sugar, and eggs — demonstrating how delightful simplicity can be. Whether you prefer your tarts with raisins or without, there’s a version for everyone, making them a versatile favorite. They not only represent Canadian culture but also evoke a sense of unity and tradition as families continue to pass down their cherished recipes.
My personal journey with butter tarts
My journey with old fashioned butter tarts began on one rainy afternoon when I stumbled upon my grandmother’s handwritten recipe tucked away in an old cookbook. As I mixed the ingredients, I felt a wave of nostalgia wash over me. Each stir in the bowl felt like a bridge to my childhood memories, from family get-togethers to holiday celebrations, all revolving around the sweet joy of butter tarts.
When I finally baked my first batch, I was amazed at how the buttery aroma enveloped my home, bringing back all those wonderful memories. Sharing them with friends sparked conversations about their own experiences, creating a delightful connection through food. It’s remarkable how something as simple as a tart can foster such warmth and storytelling.
So, if you’re ready to embark on your own butter tart adventure, let’s dive into the recipe that will help you create your delightful version of this cherished classic!
Ingredients for Old Fashioned Butter Tarts
Essential Ingredients
Creating old fashioned butter tarts starts with the basics, and these are the must-haves for achieving that signature sweet and gooey filling:
- Pastry Dough: A simple mixture of flour, butter, sugar, and water will do the trick. Homemade dough is always the best, but store-bought works in a pinch.
- Brown Sugar: This adds rich caramel notes that are essential for the classic butter tart flavor.
- Eggs: They provide structure and help the filling set beautifully.
- Butter: Use unsalted butter for better control over the sweetness.
- Corn Syrup: A staple ingredient that gives the filling its signature texture and sweetness.
Optional Ingredients for Customization
Feeling adventurous? You can elevate your old fashioned butter tarts with fun add-ins:
- Nuts: Chopped pecans or walnuts create a delightful crunch.
- Raisins or Currants: Add these for a hint of fruity flavor and added texture.
- Dark Chocolate Chips: For chocolate lovers, this is a game-changer!
Tips for Sourcing the Best Ingredients
To ensure your old fashioned butter tarts are top-notch, consider the following:
- Local Farmers’ Markets: Great places to find fresh eggs and locally sourced butter.
- Organic Options: Look for organic sugar and flour for a healthier twist.
- Quality Control: Always check the expiration dates on your ingredients, especially for butter and eggs. Freshness is key for optimal flavor.
By focusing on quality ingredients, you’ll create butter tarts that are not just treats but delightful, homemade experiences. For a deeper dive into the world of pastry ingredients, check out sources like The Kitchn or Serious Eats.
Step-by-Step Preparation of Old Fashioned Butter Tarts
Making old fashioned butter tarts is a heartwarming experience that evokes fond memories of family gatherings and holiday celebrations. They are sweet, delightful, and oh-so-satisfying. Let’s dive into the details and get started!
Gather Your Ingredients
First up, it’s important to have all your ingredients on hand. Here’s what you’ll need:
-
For the tart shells:
-
1 ½ cups all-purpose flour
-
½ cup unsalted butter, chilled and diced
-
¼ cup granulated sugar
-
1 egg yolk
-
3 tablespoons cold water
-
For the filling:
-
1 cup packed brown sugar
-
½ cup corn syrup (or maple syrup for a twist)
-
¼ cup unsalted butter, melted
-
2 eggs
-
1 teaspoon vanilla extract
-
A pinch of salt
-
Optional: ½ cup raisins or chopped nuts (pecans or walnuts work great)
Before you start, it’s a good idea to double-check your pantry. Nothing is worse than realizing you’re out of an essential ingredient halfway through.
Preheat the Oven and Prepare the Baking Sheet
Next, preheat your oven to 375°F (190°C). This ensures the tarts will bake evenly. Don’t forget to line a baking sheet with parchment paper. This makes cleanup a breeze and helps you avoid stuck tarts.
Create the Filling Mixture
Now onto the filling. In a medium bowl, whisk together the brown sugar, corn syrup, melted butter, eggs, vanilla extract, and a pinch of salt until well combined. The mixture should be smooth and creamy. If you want to add a little extra flair, consider stirring in a splash of bourbon or a teaspoon of maple syrup for depth of flavor.
Prepare the Tart Shells
In a large bowl, mix the flour and sugar together. Add the chilled, diced butter, and use a fork or pastry cutter to blend until the mixture resembles coarse crumbs. Stir in the egg yolk and enough cold water to form a dough. Divide the dough into small balls, about the size of a golf ball. Roll each ball out on a floured surface to fit your tart pans.
Gently press the rolled dough into the pans, ensuring they are roughly about ¼ inch thick. Trim any excess dough hanging over the edges.
Fill the Tarts with Raisins and Nuts
Here comes the fun part! If you’re using raisins and nuts, place a small amount in each tart shell. This adds texture and a bit of chewiness that pairs beautifully with the sweet filling. Pour the filling mixture over the top until each tart is filled but not overflowing. Leave about a ¼ inch of the shell exposed.
Bake and Let Cool
Pop those tart-filled beauties in the oven for about 15-20 minutes or until the filling is bubbly and the edges of the shells are golden brown. Keep an eye on them to ensure they don’t overbake—no one likes a burnt tart. Once they’re out, let them cool in the pans for a few minutes before transferring to a wire rack. This helps avoid soggy bottoms!
Enjoy Your Homemade Tarts!
Now that your old fashioned butter tarts are ready, it’s finally time to enjoy the fruits of your labor. Pair them with a hot cup of tea or coffee for the perfect afternoon treat. Share them with friends and family, or keep them all to yourself—no judgment here!
And while you’re savoring each bite, think about experimenting with different fillings or toppings next time. Practical ideas include adding coconut or chocolate chips for a flavorful twist.
Happy baking!
Variations on Old Fashioned Butter Tarts
Old fashioned butter tarts are a delightful treat, but what if you could elevate this classic dessert with a few delicious variations? Let’s explore some fun twists that will impress your friends and satisfy your sweet tooth!
Vegan Butter Tarts
For those seeking a plant-based alternative, creating vegan butter tarts is simpler than you might think. Substitute traditional ingredients like eggs and dairy with flaxseed meal for binding and coconut cream for that rich, buttery flavor. A quick search on Vegan Baking can yield some fantastic recipes that retain the delightful essence of the original.
Chocolate Chip Butter Tarts
If you’re a chocoholic, chocolate chip old fashioned butter tarts should be on your list! Simply add semi-sweet or dark chocolate chips into your filling before baking. The gooey chocolate melts into the warm custard, making for an indulgent bite. Who wouldn’t love that combination? Try replacing some of the sugar in the recipe with cocoa powder for that real chocolate flavor!
Fruit-Infused Butter Tarts
Want to add a burst of freshness? Consider incorporating seasonal fruits like cranberries, blueberries, or even diced peaches into your filling. Fruit-infused butter tarts bring not only color but also a delightful tartness that balances the sweetness perfectly. For inspiration, check out Seasonal Eating for ideas on fruit pairings that resonate well with the rich taste of old fashioned butter tarts.
With these variations, your butter tarts can cater to a wider audience, introducing even more people to the classic delight! Why not give one a try at your next gathering?
Cooking Tips and Notes for Old Fashioned Butter Tarts
Crafting Your Own Tart Shells
Creating your own tart shells for old fashioned butter tarts can be a rewarding experience. Start with a simple recipe using flour, butter, and a pinch of salt. For a flakier texture, use chilled butter and handle the dough as little as possible. Once you form your crust, let it chill in the fridge for about 30 minutes before baking. This helps to prevent shrinking and ensures a golden finish.
Preventing Runny Filling
No one wants a soggy tart! To avoid a filling that’s too runny, try these tips:
- Use fresh, high-quality ingredients.
- Ensure your eggs are well beaten before adding.
- Cook the filling slightly before pouring it into the shells to activate the thickening properties.
Reviving Hard Raisins
If your raisins have become tough or dried out, fear not! Soaking them in warm water or fruit juice for about 15-20 minutes can do wonders. This not only revives their texture but also enhances their natural sweetness, making them an even better addition to your old fashioned butter tarts.
For more baking tips, consider exploring resources like the Joy of Baking or King Arthur Baking. Happy baking!
Serving Suggestions for Old Fashioned Butter Tarts
Pairing with Tea or Coffee
To enjoy old fashioned butter tarts truly, consider pairing them with your favorite tea or a rich cup of coffee. The sweetness of the tarts complements the bitter notes of coffee beautifully, while a delicate herbal tea can offer a delightful contrast. Think about a classic Earl Grey with its citrusy notes or a smooth cappuccino that enriches the overall experience.
Perfect Occasions to Serve Butter Tarts
Old fashioned butter tarts are versatile treats suitable for many occasions:
- Family gatherings: Bring a tray of tarts to your next family dinner for a nostalgic touch.
- Holiday celebrations: They make an excellent addition to dessert tables during festive times, like Thanksgiving or Christmas.
- Coffee mornings with friends: Surprise your pals with these delightful bites during your next coffee catch-up.
Storage Tips for Remaining Tarts
If you happen to have leftover old fashioned butter tarts, no problem! Store them in an airtight container at room temperature for up to three days, or refrigerate them for up to a week. For longer storage, freeze the tarts individually wrapped in plastic wrap and placed in a freezer-safe container; they’ll stay fresh for several months. Just remember to let them come to room temperature before enjoying again!
For more information on how to elevate your dessert experience, check out resources on pastry techniques from culinary experts like The Kitchn.
Time Breakdown for Old Fashioned Butter Tarts
Preparation Time
Making delectable old fashioned butter tarts will take you about 20 to 30 minutes. Begin by gathering all your ingredients and ensure you have everything on hand. A little kitchen organization can save you time and hassle!
Baking Time
Pop those tarts into a preheated oven at 375°F (190°C) for 25 to 30 minutes. You want them to be perfectly golden and slightly bubbling to capture that homemade charm.
Total Time Including Cooling
Once you take the old fashioned butter tarts out of the oven, allow them to cool for about 15 to 20 minutes before indulging. This brings the total time to approximately 1 hour. Patience pays off!
For a delightful twist, consider exploring this resource on tart variations to inspire your baking journey!
Nutritional Facts for Old Fashioned Butter Tarts
Calories per tart
One delightful old fashioned butter tart typically contains around 200-250 calories. While it’s a sweet treat, it’s important to enjoy these tarts with a mindful approach.
Breakdown of macronutrients
In terms of macronutrients, an old fashioned butter tart generally consists of:
- Carbohydrates: About 30 grams, primarily from the crust and filling.
- Fat: Roughly 10-15 grams, a significant portion coming from butter and sugars, providing a rich, satisfying texture.
- Protein: Generally low, around 2-3 grams, mostly from the eggs.
Importance of moderation
Indulging in an old fashioned butter tart, while delightful, should be done in moderation. Balancing these sweet treats with a nutrient-rich diet ensures that you can enjoy every bite guilt-free. Plus, sharing with friends or at gatherings can make those yummy bites last longer!
For more insights on balanced eating habits, check out the Harvard T.H. Chan School of Public Health. Sharing knowledge and treats makes both our waistlines and friendships better!
FAQs about Old Fashioned Butter Tarts
What makes a butter tart “old fashioned”?
When you think of old fashioned butter tarts, what often comes to mind is a rich, gooey filling encased in a flaky, buttery pastry. This classic Canadian treat is typically made with just a handful of ingredients like brown sugar, butter, and eggs. The term “old fashioned” refers to those cherished recipes that have been passed down through generations, often featuring a sweet, slightly caramelized filling that perfectly balances sweetness and richness. While modern variations might include chocolate or nuts, true old fashioned butter tarts stick to the essentials—a nod to their humble beginnings.
Can I freeze butter tarts?
Absolutely! One of the great things about butter tarts is their ability to freeze well. Just bake them, then let them cool completely. Wrap each tart in plastic wrap and place them in an airtight container or a zip-top bag. You can freeze them for up to three months. When you’re ready to enjoy them, simply thaw them in the fridge or at room temperature and warm them in the oven for a few minutes for that fresh-baked taste again!
How do I know when they’re done baking?
Knowing when your butter tarts are perfectly baked can be the tricky part! You’ll want to look for a few key indicators:
- The edges should be set and the filling should jiggle a bit in the center but not appear overly liquidy.
- A golden-brown crust will indicate that they’re ready to come out.
For a little extra assurance, you can use a toothpick; if it comes out clean, your tarts are good to go! Remember, they’ll continue to set a bit as they cool, so don’t worry if they look a smidge underdone right out of the oven.
For more tips on perfecting your baking, consider checking out resources from The Food Network or Serious Eats. Happy baking!
Conclusion on Old Fashioned Butter Tarts
Recap of the joy of making butter tarts
Making old fashioned butter tarts is not just about the delightful end product; it’s a joyful process that brings out your creativity in the kitchen. The aroma of caramelizing sugar fills the air as you prepare the rich filling, transporting you back to simpler times.
Encouragement to try the recipe
If you haven’t yet tried your hand at these classic treats, now is the perfect time! This recipe is straightforward and rewarding, allowing you to impress friends and family with your baking skills. Plus, the satisfaction of biting into a perfectly baked tart is simply unmatched.
Invitation to share experiences with butter tarts
Once you’ve tried these old fashioned butter tarts, I’d love to hear your stories! What fillings did you choose? Did you make any creative tweaks? Feel free to share your baking escapades in the comments or connect with others in the baking community to spread the joy. Remember, every tart tells a story! For further inspiration, check out The Great Canadian Baking Show for an array of delightful treats.
PrintOld Fashioned Butter Tarts: The Best Sweet Indulgence at Home
Discover how to make the best Old Fashioned Butter Tarts right at home with this easy recipe that promises delightful, sweet indulgence.
- Prep Time: 15 minutes
- Cook Time: 25 minutes
- Total Time: 40 minutes
- Yield: 12 tarts
- Category: Dessert
- Method: Baking
- Cuisine: Canadian
- Diet: Vegetarian
Ingredients
- 1 cup brown sugar
- 1/2 cup unsalted butter
- 2 large eggs
- 1 teaspoon vanilla extract
- 1/2 cup pecans (optional)
- 1/4 teaspoon salt
- 1 tablespoon all-purpose flour
Instructions
- Preheat the oven to 375°F (190°C).
- In a bowl, combine brown sugar and melted butter, stirring until well mixed.
- Add the eggs, vanilla extract, salt, and flour; mix until smooth.
- If using, fold in the pecans.
- Pour the filling into prepared tart shells.
- Bake for 20-25 minutes until the filling is set and golden brown.
- Let cool before serving.
Notes
- Ensure the tart shells are fully baked prior to adding the filling for best results.
- Experiment with adding raisins for a unique twist.
Nutrition
- Serving Size: 1 tart
- Calories: 200
- Sugar: 15g
- Sodium: 100mg
- Fat: 10g
- Saturated Fat: 6g
- Unsaturated Fat: 3g
- Trans Fat: 0g
- Carbohydrates: 25g
- Fiber: 1g
- Protein: 2g
- Cholesterol: 50mg