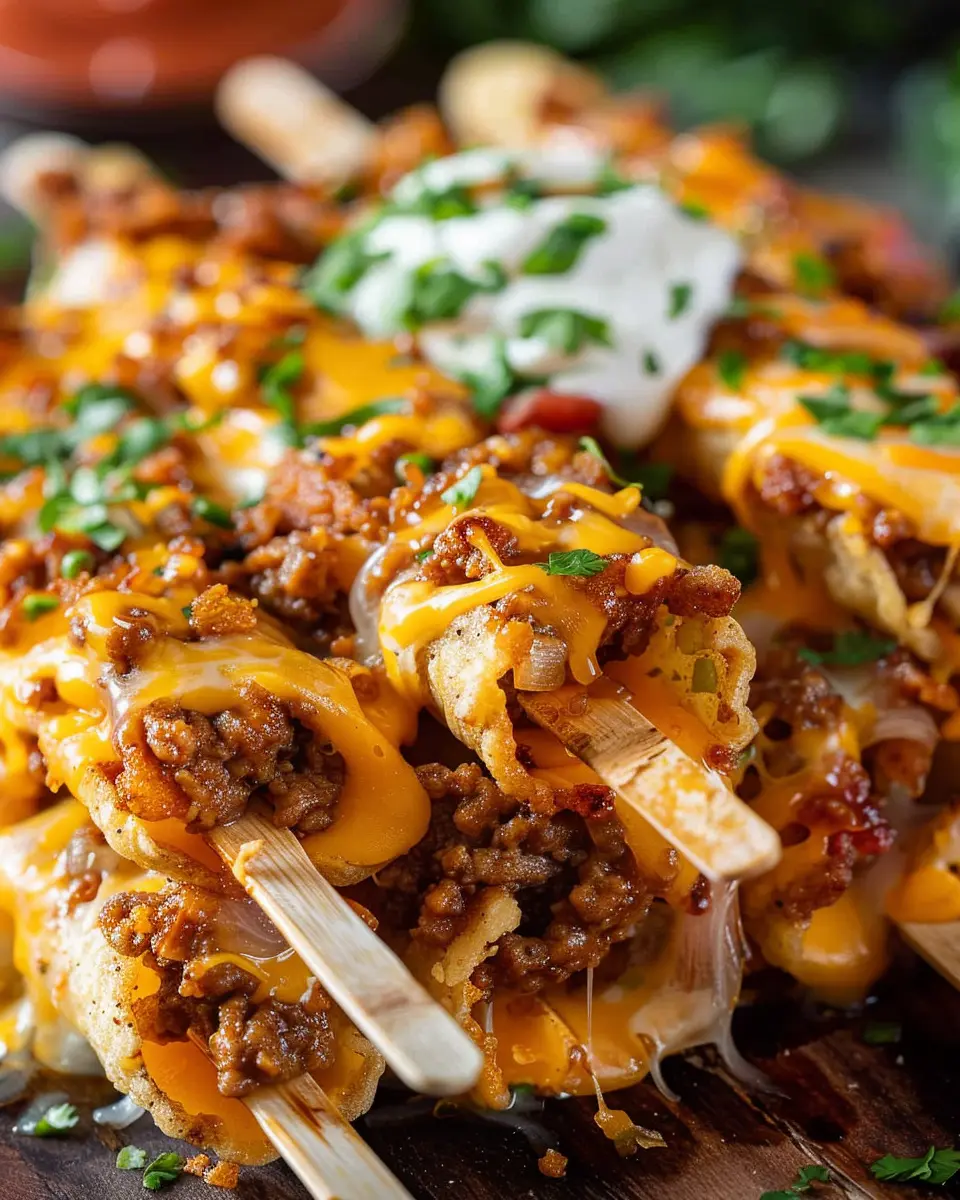
Introduction to Cheesy Taco Sticks
Are you on the hunt for a crowd-pleasing snack that’s sure to steal the show at your next get-together? Look no further than cheesy taco sticks! These delightful treats combine the irresistible flavors of taco night with a cheesy, gooey twist that leaves anyone wanting more. Perfect for parties, game days, or just a cozy movie night at home, cheesy taco sticks are versatile and surprisingly easy to make.
Why Cheesy Taco Sticks are the Ultimate Snack
What sets cheesy taco sticks apart from traditional snacks? For starters, they bring that familiar taco goodness wrapped in a crunchy exterior that invites you to take a bite. With every stick, you get a satisfying blend of seasoned ground beef, turkey bacon, and melted cheese enveloped in a crispy tortilla. According to Nutritionists , incorporating protein-rich ingredients like beef and bacon not only boosts flavor but also keeps you full longer—perfect for those late-night cravings.
Another excellent feature of cheesy taco sticks is their adaptability. You can customize them to suit your dietary preferences or any guests you may have. Want to skip the meat? No problem—try a veggie version packed with colorful bell peppers, black beans, and cheese. Hosting a gluten-free crowd? Simply swap in gluten-free tortillas, and BAM, they’re good to go! The possibilities are as endless as your imagination.
Imagine your friends’ faces lighting up as they pull apart these delicious goodies, melted cheese stretching tantalizingly. Pair them with your favorite dips like salsa or guacamole, and you have an addictive snack that transforms any ordinary gathering into a festive celebration.
So, whether you’re sharing with friends or savoring them solo during your Netflix binge, cheesy taco sticks are a must-try recipe that you’ll return to time and time again. Ready to elevate your snack game? Let’s dive into the delicious process of making these cheesy wonders!

Ingredients for Cheesy Taco Sticks
Creating the ultimate cheesy taco sticks begins with gathering the right ingredients. Here’s a handy list to set you on your culinary adventure!
Essential Ingredients for Cheesy Taco Sticks
- Tortillas: Flour tortillas work best for a soft, chewy texture that wraps around the filling beautifully.
- Ground Beef: A classic taco filling that delivers savory flavor and satisfying protein.
- Turkey Bacon: For that smoky, crunchy texture, turkey bacon is a lighter alternative to traditional pork.
- Chicken Ham: Adds a delicious, savory element without being too overpowering.
- Cheddar Cheese: Shredded cheese is a must for that gooey, melty goodness that defines cheesy taco sticks.
- Taco Seasoning: A blend of spices elevates the flavor—store-bought or homemade, either works!
Optional Add-Ins for Extra Flavor
Want to kick things up a notch? Consider adding:
- Jalapeños: For a spicy kick!
- Refried Beans: To incorporate creamy texture and additional protein.
- Bell Peppers or Onions: For freshness and crunch.
Adding these ingredients can bring your cheesy taco sticks to life, making them a delightful snack for any gathering! Need ideas on how to serve these? Check out Food Network’s entertaining tips for some inspiration.
Step-by-Step Preparation of Cheesy Taco Sticks
Creating delicious cheesy taco sticks is a fun and mouthwatering way to elevate your next gathering. Whether you’re prepping for game day or hosting a cozy movie night, these savory snacks are sure to impress. Let’s dive into each step of the process so you can whip these up with ease.
Cook the Meat to Perfection
The heart of your cheesy taco sticks lies in the flavorful meat filling. For a delightfully rich flavor, I recommend using ground beef mixed with seasoning or turkey bacon for an added twist. Here’s how to prepare it:
-
Ingredients:
-
1 lb ground beef
-
1 tablespoon taco seasoning (store-bought or homemade)
-
1/2 cup diced onions
-
1/2 cup diced bell peppers (optional)
-
Salt and pepper to taste
-
Steps:
- In a large skillet over medium heat, add a splash of olive oil.
- Once heated, add the onions and bell peppers. Sauté for about 3-4 minutes until tender.
- Then, add the ground beef. Cook until browned, breaking it apart with a spatula.
- Mix in your taco seasoning and splash in a bit of water (just enough to moisten).
- Let it simmer for a couple of minutes, allowing the flavors to meld. This is where the magic happens!
For more seasoning tips, check out Serious Eats’ guide on perfecting taco meat.
Get Your Dough Ready
Next, let’s make the dough that will encase your flavorful filling. You can either make your own dough or cheat a little with store-bought options. If you’re up for making dough, here’s a simple recipe to follow:
-
Dough Ingredients:
-
2 cups all-purpose flour
-
1 teaspoon baking powder
-
1/2 teaspoon salt
-
1/3 cup butter, softened
-
1/2 cup cold water
-
Dough Steps:
- In a mixing bowl, combine flour, baking powder, and salt.
- Cut in the softened butter until the mixture resembles coarse crumbs.
- Gradually add cold water, mixing until a dough forms.
- Knead lightly on a floured surface until smooth, then wrap in plastic wrap and let it rest while you prep the fl filling.
Assemble the Cheesy Taco Sticks
Now comes the fun part—assembling your cheesy taco sticks! You’ll want cheese to be part of this equation. Here’s how to do it:
- Preheat your oven to 400°F (200°C).
- Roll out your dough on a floured surface to about 1/4 inch thick.
- Cut the dough into rectangles (approximately 3×5 inches).
- Place a generous spoonful of the cooked meat mixture in the center of each rectangle.
- Sprinkle some shredded cheese on top (cheddar works beautifully!).
- Fold the dough over to create a pocket and seal the edges with your fingers or a fork.
Bake Your Delicious Creations
Once your cheesy taco sticks are assembled, it’s time to give them that golden-brown finish:
- Place them on a baking sheet lined with parchment paper.
- Brush the tops lightly with a beaten egg for a beautiful sheen.
- Bake in the preheated oven for about 20-25 minutes, or until they are puffed and golden.
Keep an eye on them—nothing beats that aroma wafting through your kitchen!
Let Them Cool Before Serving
Before you dig in, make sure to let your cheesy taco sticks cool for a few minutes. This allows the cheese to settle slightly and makes them easier to handle.
Transfer them to a serving platter and pair with your favorite dipping sauces, like sour cream, guacamole, or salsa. Not only will you impress your guests, but they’ll also appreciate your effort to create such delicious snacks!
With this step-by-step guide, you’ll be serving up cheesy taco perfection in no time. Enjoy the compliments that come your way and the joy of sharing delicious food!
Variations on Cheesy Taco Sticks
If you’re thinking about taking your cheesy taco sticks game to the next level, you’re in the right place! Here are some fun and tasty variations to elevate your snack experience.
Vegetarian Cheesy Taco Sticks
For those looking to enjoy a meat-free option, try stuffing your cheesy taco sticks with black beans, corn, and bell peppers. Not only are these sticks vibrant and filling, but they’re also packed with nutrients. Simply sauté the veggies with taco seasoning for an extra kick. You can even add some avocado or a dollop of Greek yogurt on the side for a creamy, delicious touch!
Spicy Cheesy Taco Sticks with Jalapeños
Are you a spice lover? Then spicy cheesy taco sticks with jalapeños will be your new best friend! Just dice some fresh jalapeños and mix them in with your cheese filling. You could also experiment with chipotle peppers in adobo sauce for a smoky flavor. Remember to adjust the heat by removing the seeds if you want a milder version. Serve these with a refreshing cucumber or lime-infused drink to balance the spice, making each bite deliciously enjoyable.
Cheesy Taco Sticks with Different Cheeses
Who says you have to stick to just one type of cheese? Mix it up by trying different varieties like pepper jack for a spicy twist, or creamy cheddar for nostalgia. You could even create a mix, combining mozzarella for meltiness and gouda for a slightly nutty flavor. The right cheese can make all the difference, and with so many options out there, you’ll never get bored!
These variations on cheesy taco sticks are sure to impress your friends at the next gathering. Why not give them a try? For more ideas on fun party snacks, check out resources like the American Culinary Federation for inspiration!
Cooking Tips and Notes for Cheesy Taco Sticks
How to Avoid Soggy Dough
When making cheesy taco sticks, one common pitfall is soggy dough. To prevent this, ensure that your ingredients are not too wet. If using vegetables, consider sautéing them first to eliminate excess moisture. After assembling, bake them immediately instead of letting them sit, as this will help retain a satisfying crunch. Also, don’t forget to brush the tops with a little oil before baking; it enhances browning and flavor while keeping the dough crisp.
Make-Ahead Options
Want to make your cheesy taco sticks ahead of time? You’re in luck! Assemble the sticks, but don’t bake them just yet. Instead, wrap them tightly in plastic wrap and store them in the fridge for up to 24 hours, or freeze them for later. Just remember to add extra baking time if they’re frozen; no one likes a chilly snack! Check out this resource on freezing tips for additional insights.
By preparing in advance, you’ll elevate your snack game at your next gathering, leaving you free to enjoy time with friends!

Serving Suggestions for Cheesy Taco Sticks
Best Dips for Your Cheesy Taco Sticks
When it comes to enjoying cheesy taco sticks, the right dip can elevate your snacking experience. Here are a few crowd-pleasers to consider:
- Guacamole: The creamy texture adds a delightful contrast to the crispy taco sticks.
- Sour Cream & Chive: A classic combo that brings a refreshing twist to each bite.
- Salsa: Choose a mild or spicy variety, depending on your spice tolerance!
- Cheesy Queso: Because, let’s face it, you’re never too cheesy!
With these options, your guests will have a range of flavors to explore.
Creative Plating Ideas for Parties
Presentation matters, especially when serving cheesy taco sticks to friends. Try these fun plating ideas:
- Taco Bar Style: Arrange the sticks in a taco holder with various dips on the side, creating a festive taco truck vibe.
- Skewered Display: Thread your cheesy delights onto skewers for easy grabbing. This also enhances the visual appeal!
- Chip Bowl: Lay out the taco sticks in a bowl surrounded by tortilla chips for a casual yet enticing look.
These simple tips can transform your gathering into a memorable event!
Time Breakdown for Cheesy Taco Sticks
Planning to serve up these delectable cheesy taco sticks at your next gathering? Here’s a handy time breakdown to help you organize your cooking.
Prep Time
Getting ready for these scrumptious cheesy taco sticks takes about 15 minutes. This includes gathering your ingredients and mixing up the yummy fillings. Pro tip: having everything measured out and prepped makes cooking a breeze.
Cook Time
Once your sticks are assembled, they’ll need approximately 20 minutes in the oven. Enjoy the delightful aroma filling your kitchen while they bake to perfection!
Total Time
In total, you’re looking at about 35 minutes from start to finish. Perfect for a quick and satisfying party snack!
These quick bites are sure to impress your guests, so why not check out this article for more snack ideas?
Nutritional Facts for Cheesy Taco Sticks
Calories per Serving
Each serving of these delightful cheesy taco sticks packs in approximately 200 calories. This makes them a great option for a party snack, allowing your guests to indulge without going overboard.
Key Nutritional Highlights
These cheesy taco sticks are not just tasty; they offer a solid nutritional profile:
- Protein Boost: With turkey bacon and chicken ham, you get a good amount of protein to keep you satisfied.
- Fiber Content: Add some black beans or corn for a fiber kick, supporting digestion and keeping you full longer.
- Vitamins and Minerals: The veggies in your taco filling bring essential vitamins, helping you feel good about your snacking choices.
For more information on maintaining a balanced diet while enjoying your favorite snacks, check out resources from the American Heart Association. Who knew indulging in cheesy taco sticks could be both fun and nutritious?
FAQs about Cheesy Taco Sticks
Can I Freeze Cheesy Taco Sticks?
Absolutely! Freezing cheesy taco sticks is a smart way to prepare for future snacking. Just make sure they’re completely cooled before wrapping them tightly in plastic wrap or aluminum foil, and then pop them in an airtight container. They can last for up to three months in the freezer. When you’re ready to enjoy them again, simply follow the reheating instructions below!
What Other Meats Can I Use?
While the classic cheesy taco sticks are delicious with ground beef, feel free to switch things up according to your preference! Consider using grilled chicken or turkey bacon for a healthier twist. Ground turkey or even plant-based crumbles can provide a delicious vegetarian option. The key is to ensure whatever meat you use is well-seasoned. For additional ideas, you can check out this meat alternatives guide.
How to Reheat Cheesy Taco Sticks for Crispiness?
Reheating cheesy taco sticks so they stay crispy is simple! The best method is to use your oven. Preheat it to 350°F (175°C), place the sticks on a baking sheet, and heat them for about 10 to 15 minutes. Avoid using the microwave, as it can make them soggy. Another method is to use an air fryer, which can restore that delightful crunch in just a few minutes. Enjoy your delicious cheesy taco sticks as if they were freshly made!
Make sure to keep these tips handy for your next gathering—your friends will appreciate the delicious effort!
Conclusion on Cheesy Taco Sticks
Why You’ll Love Making Cheesy Taco Sticks at Home
Making cheesy taco sticks at home is not only enjoyable but also incredibly rewarding. You’ll love the ability to customize the flavors to suit your personal taste or impress your friends at a gathering. Just imagine the satisfaction of pulling a golden, cheesy snack out of the oven, and everyone raving about how delicious they are!
With their perfect blend of gooey cheese, savory turkey bacon, and zesty beef, these cheesy taco sticks are bound to become a staple in your kitchen. Plus, they’re simple to prepare, making them an excellent choice for both beginner cooks and kitchen pros alike. So grab your ingredients, channel your inner chef, and get ready to wow your guests with this ultimate party snack! For more delightful snack recipes, check out this guide on party appetizers.
PrintCheesy Taco Sticks: The Ultimate Indulgent Party Snack Recipe

Deliciously cheesy and packed with flavors, these Cheesy Taco Sticks are the perfect party snack that everyone will love!
- Prep Time: 15 minutes
- Cook Time: 20 minutes
- Total Time: 35 minutes
- Yield: 24 pieces
- Category: Appetizers
- Method: Baking
- Cuisine: Mexican
- Diet: None
Ingredients
- 1 pound ground beef
- 1 packet taco seasoning
- 2 cups shredded cheddar cheese
- 1 package crescent roll dough
- 1 cup salsa
- 1/2 cup sour cream
Instructions
- Preheat the oven to 375°F (190°C).
- In a skillet, brown the ground beef over medium heat. Drain excess fat.
- Add taco seasoning to the beef and follow package directions.
- Unroll the crescent roll dough on a baking sheet.
- Spread the cooked beef evenly over the dough and top with shredded cheese.
- Roll up the dough tightly and cut into 1-inch pieces.
- Place the rolls on the baking sheet and bake for 15-20 minutes or until golden brown.
- Serve with salsa and sour cream for dipping.
Notes
- For extra flavor, add chopped onions and peppers to the beef.
- These can be made ahead of time and frozen before baking.
Nutrition
- Serving Size: 2 pieces
- Calories: 180
- Sugar: 1g
- Sodium: 350mg
- Fat: 12g
- Saturated Fat: 6g
- Unsaturated Fat: 4g
- Trans Fat: 0g
- Carbohydrates: 10g
- Fiber: 1g
- Protein: 10g
- Cholesterol: 30mg